Friday, 15 December 2023

Matching Pairs\The Dyslexia Advantage

 It turns out there are some advantages with Dyslexia.

The Advantage

I recently came across this YouTube video.


It starts with how Dyslexic people can be better at identifying impossible shapes (like a Necker-Cube), but it turns out that there are a number of cases where dyslexic people are better at processing images as a whole; or containing scattered information; or interpreting information at the periphery of their vision.

And part of this is the trade-off from the relatively short period since humanity developed writing, compared with the relatively long period where a variety of visual abilities were more advantageous.

The interesting thing for me is that it made me think about why why my younger sister (who has some degree of Dyslexia) always used to beat me at card games, starting with Matching Pairs, even when we were really young. And this is perhaps a reason why.

Matching Pairs

I'd have a basic strategy for Matching Pairs, and I needed a strategy, because I couldn't remember the layout of the images when flipped over; nor the set of cards that had been flipped.

So, my strategy was that firstly, if I couldn't remember where two matching cards were (which was the normal case), then I'd randomly turn a card that I didn't think had been picked before (or recently). So, if it was familiar, I could guess at picking a matching card. However, if it wasn't familiar, I'd then try to pick another card that wasn't in the set of what I thought were recent cards, because then there's a better chance of picking a matching card.

The trouble was that even if the first card was familiar, I'd never know where the matching card was, I'd merely have a feeling about the general area. That meant I was wrong most of the time.

Reflecting on the way my memory works - which is visual, is somewhat like this:

Imagine in Matching pairs your whole visual field either contains a single card turned over, or there's a grid of unturned cards; or there are two turned cards and you can see how far one is away from the other, but not able to remember their absolute positions.

Then in the history of the game so far, you can flag up the areas where cards have been found, but each of those positions could contain any one of the cards seen so far. That's why it's challenging for me even though it's such a simple game.

For someone with Dyslexia, it could be an easier game, because they'd have a better sense of the whole playing area for the cards that have been turned over: rather like being able to visualise it in that state. Hence my sister was much better at playing the game than me.

ZX81 Version

Because it's such a simple game, it didn't take me long to imagine how I'd write a version in BASIC for a ZX81. Here's the listing for it. You can play it yourself by going to the ZX81 Javascript emulator and typing in the listing below:

Note: In line 5, the 16 graphics characters are: <space><graphic 1>..<graphic 7><graphic Q>..<graphic Y><graphic space>.


Playing The Game

The game works as a two-player game. A grid of 6 x 6 (i.e. 36) tiles are generated, each of which contains 18, unique pairs of random 4x4 pixel patterns. They're initially shown all face-down with the digits 0..9, then A..Z in the top left-hand corner of each tile.

Player 1 then types one of these characters (e.g. '0') and that tile is turned over. Then Player 1 types another character (e.g. 'J') and its tile is turned over. If the tiles match, Player 1's score is incremented otherwise the tiles remain turned over for 2 seconds to give the user a chance to memorise them before being turned back.

Player 2 always has the next go and they choose the codes for two overturned tiles in sequence as per Player 1.

Play returns to player 1 and both players repeat the process. Over time, more and more pairs are found.


The game finishes when all the tiles have been matched. The player with the most overturned tiles wins (or if both have 9 pairs each, it's a draw).

This version of the game is good for exploring players' relative strengths. In particular, one of the differences between this game and a classical Matching Pairs game is that the patterns on each tile are abstract, because they're just a random arrangement of 4x4 pixels rather than familiar images. This makes it easier for people who can process abstract images more easily.

The Automatic Game

It's fairly easy to change the game so that the computer plays itself. In this version, the program selects a random character in the right range, as though it was typed and then the simulation plays out just as it would with human players. We don't need to pause at the end of every go where there's no match, but we do need to make sure that the computer doesn't try to pick the same tile twice, nor overturn tiles that are already matched: so we set matched pairs to '<space>' characters and build in an extra rule.


There are three things I really noted about the automatic game. Firstly, the ZX81 is terribly slow. Even though its effective reaction times are much faster than a human, I found it would take over 20 minutes to solve a game, about 3 or 4 times slower than a pair of humans.

Secondly, even though I consider myself to have a terrible memory for this kind of game, the automatic version shows that I do in fact remember the patterns much better than my personal algorithm described above implies: I would end up remembering the positions of several pairs while the computer was repeatedly choosing the wrong second tile for one I already knew. Some of this came from the sheer repetition of wrong moves by the computer, but it still demonstrated that I was in fact memorising locations even though I thought I didn't.

Thirdly, watching it was quite pleasantly calming and after several minutes I struggled to stay awake! Yay for boring programs as a cure for insomnia!

Program Analysis

I originally wanted the game to fit in 1kB, but that turned out not to be possible - at least I don't yet know how to squeeze it down. The two-player code itself is about 1124 bytes long if I remove the REM'd statements in lines 83 and 86, but include the extra automatic game checking in lines 125, 130, 203 and 206. To do this it has all the normal short-cuts like NOT PI (0), SGN PI (1), CODE "X" for some values in the range 10..255 and VAL "X" for others.

Generating Patterns

The first challenge with the game was to create the random set of patterns. I didn't store any fixed pictures, because the ZX81 has such terrible graphics anyway it hardly seemed worthwhile and also, it would take up memory I didn't want to waste.

So, instead I created 4x4 block patterns. The first issue then is how to create random patterns without duplicating them - the ZX81 is slow, so if I was checking each new pattern against all the previous ones, it would take O(n²) time, up to about 1000 checks. Instead what I did was simply generate a random number and then use the ZX81's 16-bit System Variable: SEED to generate the pattern directly, since every time it executes RND, SEED is updated, but it goes through all the 65536 binary values before repeating itself: hence I didn't need to check for repeats. I stored each 16-bit random pattern in a pair of 8-bit characters; so I needed an array of 18, 2-byte strings (M$) to do this.

The second challenge was to make sure I created proper pairs of values in a random order. To do this I first split the card generation into two levels: the 18 card patterns, which were 16-bits, and the cards themselves, which are indexes to those patterns and only need to be 8-bits.

For those, I adapted my card-shuffling algorithm. I essentially created a string containing a list of pairs of cards: AABB..RR (the first to 18th letter). Then I picked & removed a random card from the 'remaining' set of sorted cards; and placed it at the beginning of the string after the previous random cards. Then defined the remaining set as the set of following cards (which is just the n+1th card onwards after n cards have been picked).

This card shuffling algorithm guarantees that all the cards get shuffled, whereas a more literal algorithm would leave some pairs of cards still in order, if they didn't happen to be picked to be shuffled.

Displaying Tiles

I wanted to be able to display back-facing tiles without using any graphics characters used by tiles themselves and without spaces between, so I used ':'s for the main background and
 graphic characters between them. The routine for displaying tiles is a bit convoluted as it involves a loop for each row, but it saves on 3 different AT calculations. Perhaps, a single Print AT would have been better (and faster than the loop).

For the front side I didn't need to consider the display of the  separators, because they've been displayed earlier. All I needed to do was display each row, which was fairly easy as each row is 8-pixels. So, I obtained the pattern from the tile in P$ indexed by the position (1..36). This gave me a two character M$ string, one character per row. Then I extracted each nibble and indexed that into the graphics patterns in C$.

The Y, X print AT calculations were common to both front and back facing tiles, so I factored that. None of this is fast, but it's fast enough for playing interactively.

A 1K Version

It always seems that I should be able to squeeze a ZX81 program into 1K, but perhaps the only way to do this here is to resort to machine code. The screen takes up about 20 chars per row x 21 rows + 4 = 424 bytes. The patterns and tiles take up 36 x 2 bytes = 72 bytes and the graphics take another 16 = 88 bytes.

This means the total space in BASIC is about 1124+424+88 = 1636, which means it ought to fit in a Timex Sinclair 1000 as it has 2kB instead of 1kB of RAM.

It might be shorter to compute patterns from scratch by resetting SEED each time. The ZX81 has about 800 or something bytes free, so this leaves about 300 bytes for the program - pretty tight, but at least it wouldn't take too long to write ;-) . And I could use things like the printer buffer for some extra space if needed.

Friday, 23 June 2023

QUADFIT: Least Squares Quadratic Curve Fitting on a 1K ZX81

 Yet another snappy blog post title!

The sub-theme for this one is that by rethinking a problem in a different way, we can squeeze the solution into far fewer resources.

In this case, I'd recently been doing some work (at work) which involved fitting a quadratic curve to a set of noisy datapoints (because they're derived from ADCs, which... often need a lot of filtering to get decent results despite their nominal 12-bit accuracy).

In practice I found a website that covered the Least Squares Quadratic fitting algorithm.

https://www.omnicalculator.com/statistics/quadratic-regression

The interesting thing for me is that this algorithm is explained in quite a lengthy webpage; and on top of that there's a whole side box that allows you to enter a set of (x,y) coordinates and it'll figure out the quadratic coefficients (and the correlation).

That's quite a lot of resources, which implies it's fairly involved, but is it really? Looking at the equations and how the coefficients are derived from them:


It looks like any programmer would need to store the set of (x,y) coordinates used, along with the number of coordinates n, and then perform a number of loops to sum all the terms, starting with the averages:

But the format for all the S** terms reminded me of how 1980s Casio Scientific Calculators managed to perform linear regression without needing to store an array of data, and they needed Sx, Sx2, Sxy type terms too. And it was possible to correct the data you'd entered too - even though they didn't store the data itself. How was this possible?

Well, the answer lies in observing that firstly we don't need to calculate the averages for x, x² or y, because you can simply calculate ∑x, ∑x² and ∑y after each new coordinate is entered, and divide by the current value of n. Then the same reasoning applies to calculating all the S** terms: you simply update the sums for each of them whenever you enter a new coordinate. This reduces the problem to evaluating 10 terms on each new iteration (a doesn't need to be stored, it can be merely displayed).

The final question then is how to delete data? That's surprisingly simple too, all you need to do is use the erroneous coordinate (x',y'), but subtract the corresponding x', x'², x'³, x', y', x'y', x'²y' values from the corresponding terms and then decrement n.

And because the computation really can be reduced to that degree, it can be squeezed into a 1K ZX81 (and probably an early 1980s Casio programmable!). Go to the Javascript ZX81, then type POKE 16389,17*4 [Newline] then NEW. The ZX81 is then effectively a 1kB ZX81


You'll find that as you get towards the end of the program, the edit line will start jumping up, as you're running out of memory. In fact there are a whole 78 bytes free (including the screen space used by the program) for any enhancements you want (e.g. correlation!)

Saturday, 22 April 2023

Barely Charging Network: Maybe we can't make to Fully Charged in our Zoe EV.

 Introduction

We're planning to go to the Fully Charged Live show in Farnborough in late April. We've had our 22KWh Renault Zoe for over 6 years. Our Zoe is AC-only charging, but can charge at 22KW, which means that we can travel decent distances - if 22KW charging posts are available.

Six years ago, the Ecotricity-sponsored Electric Highway chargers along UK motorways provided a relatively excellent means of getting around the country by AC charging. It (ironically) helped that even though there were few chargers, there were also few EVs, so there wasn't much competition. Today, most EVs charge via DC (CCS, though there are a few Leaf cars around that still charge via CHaDeMO) so there still isn't much competition for AC chargers.

Unfortunately, the 22KW AC Charging network in the UK has grown and simultaneously been trashed over this period. It is easy to describe why:

  • The Electric Highway has been replaced by GRIDSERVE, which initially took out all the 22KW charging facilities and replaced them with nothing. Then they installed '22KW' charging points, which never charge at the full rate. GRIDSERVE do not seem to understand that spending 2hours charging up at 11KW or less is ABSOLUTELY UNACCEPTABLE. Bosses at GRIDSERVE, a message to you: why would anyone spend 2 hours charging up at your charging points? I mean, literally anyone? Your AC market is literally ZERO people who would want to charge at your AC charging points. No-one! ZERO!!!!!!
  • Open competition against a total lack of key aspects of regulation mean that there are literally dozens of different charging apps you need to download onto your phone in order to charge. It was OK, when it was only the Electric Highway - it's not OK, when it's dozens of charging apps. And they are all variants on exactly the same thing. We only need one.
  • Many, many, MANY charging points are broken. Currently we have to plan for at least 2 alternatives to the main charging point we want to go to. Why are there no requirements for charging point maintenance? It can't all be done remotely, e.g. a software upgrade won't fix slow BP chargers that have failed due to water ingress.
  • Many charging points advertised as 22KW simply aren't. They don't charge faster than 11KW. For example, the ones at Bicester OX26 6BP. In this case, because I know they won't charge up at 22KW, there is no point in charging at them. YOU HAVE WASTED MONEY INSTALLING THESE CHARGERS. But what's worse is that because we no longer know if a proprietary 22KW charger will charge at 22KW, we can't risk using any of them, even by a different company, anywhere in the UK, unless there is proof that it's possible to actually charge at 22kW.
As it turns out, some companies' chargers really do work as advertised: BP Pulse (formerly Charge Master), Pod-Point and Swarco E-connect do work at 22kW (though some are broken).

The Plan

Getting to Farnborough involves going down the M40, where we've had problems charging a year ago. I can't see that it's any better now. There are GRIDSERVE charging points at Cherwell services after 57 miles, so that's out, because they won't charge at 22KW. There's nothing reliable that's close to that.

However, there's some charging points at Kidlington which is at about 67 miles:
Of them, only a single charging point is acceptable. The top blue one is out of the way; the remaining blue one I can't be sure about; the second BP one is out of order; the bottom one is GRIDSERVE, which don't charge at 22kW. That's a failure rate of 80%.

Moving on: there's a SWARCO E-Connect at OX1 4NA in Oxford, that's about 76.7 miles away, at the practical limit for the car. SWARCO seem to work. Then there's Westgate in Oxford where there's several 22KW charging points, but I don't know the company. Perhaps I can check.

So, this covers the mid-way charging, literally about half way there. Then we get to the Fully Charged Show Live at: Farnborough International Exhibition & Conference Centre. Here, I expanded the criteria to 7KW charges and even so, there seems to be only a few charging points.. like how is this viable given the number of people who are likely to go there by EV?


If this turns out to be viable, we then need to charge again at Kidlington on the way back. All of it is at the boundary of practicality.

Conclusion

Underneath all of these woes is a simple reason: Our government, which has utterly failed to provide regulations that ensure a working charging network. This is 'liberated' free enterprise in action, a totally dysfunctional industry, free from any sense of responsibility to its actual users.

It would not have been hard to regulate it: the bullet points above describe what need to be done:

  • Chargers should work as advertised, 22kW should mean exactly that, or a range of charging rates if uncertain.
  • Every Charging point should be registered on Zap-map (or a national body) as it's installed, along with its capabilities.
  • There should be at most one charging app to cover all charging points even from different companies. There should be access to contactless charging on all motorway charging points.
  • Maintenance should be swift, again, it should be provided at a national level.
  • Support should always be available 24/7 from a single national body.
  • Charging locations should be distributed according to the need to cover the country, not just installed where the market penetration is highest.
  • Adequate 22kW charging coverage should be supported until 80% of the cars that supported it are no longer on the roads.
Let's finish with this, because it is, surprisingly, not hard to achieve. Consider: the surface area of England: 130,279km2. A viable charging network would need a charging point every 80km, or a charging point every 692km2. So, we need: 188 x 22kW charging points to cover the country, a cost of about £188K.

In the meantime, I'm not sure we'll be able to make it to the Fully Charged Show from Birmingham in our Zoe.


Monday, 10 April 2023

Decarbonisation Sim

The IPCC (AR6) Synthesis report came out on March 20. It doesn't say anything new, it just says it louder. Climate Scientist Katharine Hayhoe has a good summary of the main points on a Twitter thread and they make for sober reading.

One of the charts, in particular, shows how global heating will increasingly severely impact people the later they were born. For example, I was born in 1968 (323ppm CO2), so if I live to 85 or so, then that will be just into the zero-carbon era, if the world can achieve the intention of the Paris Agreement, but that zero-carbon era will almost certainly be over 1.5ºC warmer than pre-industrial times.

There is increasing controversy over the way in which IPCC report policy statements have been watered-down in order to please politicians and the fossil fuel industry. Kevin Anderson covers this well in an article in The Conversation. In a sense, although we're just at the point where renewable energy deployment has reduced the rate of increase of CO2 emissions to near 0 (300MT in 2022 vs 1.4GT in 2021 [Refs]) we are also heading in the wrong direction; for example COP27 being hosted by a fossil fuel industry CEO; or new UK coal mines shortly after hosting COP26.

In addition I've been watching TickZero's YouTube videos explaining why there's little chance that we can meet net-zero by 2050 - the modelling here uses deployment latency to conclude we have to reduce energy usage by about 60% between now and 2050 in order to avoid the 50% chance of overshooting 1.5ºC. @KevinClimate's recent SGR article also makes the point forcefully:
“But such a rapid deployment of existing zero carbon technologies, in itself, can no longer be sufficient. We’ve left it so late that technology will never deliver in isolation”
People have interpreted this to mean steep reductions in energy demand, but currently I'm struggling to find the relevant Kevin Anderson quote for this:
“As always @KevinClimate sees through the smoke and mirrors! We cannot achieve deep mitigation without steep reductions in demand.” https://twitter.com/kristiansn89
As someone outside of academic circles, I'm not aware of the datasets and appropriate models needed to accurately determine what kinds of mitigation is needed, but I am interested in exploring simple models that can provide rough (but reasonable) answers to questions about the depth of mitigation and demand reduction.

The Model

My approach is fairly simple, let's assume we start with the current global energy budget. Some (most) is provided by fossil fuels and some (mostly electricity) is provided by renewable energy. Some is provided by Nuclear energy (which I don't think I've included in my model, though I can update it fairly easily to do that). If we want to fully decarbonise between now and 2050 using renewable energy (which is far easier than using nuclear power or carbon capture), then we have to allocate some of our energy budget each year to building renewable technology. The amount we allocate, directly translates into the amount of renewable energy we generate; how quickly it's deployed and how much additional energy it provides.

Global Energy

So, first we need to know how much energy we used in 2022. Now, you may find it fairly surprising, but a simple Google search for "Global energy used 2022" doesn't give you a straight answer: a figure in TWh. However, what I did find was the amount of electrical energy produced (27TWh [1]) and the proportion of global energy that's electric (20.4% in 2021 [2], which I interpreted to mean could reach 21% in 2022). So, this gives: 129TWh for global energy. I also found out that about 11% is solar heating [3].

Secondly, we need to know how much electricity is produced using renewable energy, it's currently about 29% [4], so we know that 27TWh*0.29 = 7.83TWh is renewable sources (e.g. wind, solar, hydro).

Renewable Investments

We know that Wind Turbines produce a return on investment, given their manufacturing costs, of about 21:1 (over twice as much as for fossil fuels), and if we assume that a Wind Turbine lasts 25 years, then that means 1kWh invested in a Wind Turbine produces 21kWh of energy over 25 years, which is: 0.84kWh per year. I assume the same is true for Solar PV and that there's an even mix of both [5]. Finally I know that Wind and Solar energy is getting cheaper every year, and I assume it's getting better by 7% per year, which translates into a ROI increase of 7% every year [6][7]. It's actually been twice as good as that ([6] says the improvement is $5.66/W to $0.27/W => 16% per year and [7] directly says 16%/year) and that the 21:1 ratio is from the early 2010s, and so it's significantly better now. I am assuming diminishing improvements.

So, just based on this information we can generate a model for how much energy we need to invest per year just to reach 100% renewable energy (not electricity) by 2050. That's the first value you can control in the model.

Energy Reductions

The TickZero videos and Kristiann89's tweet argue that we need to reduce energy usage as well over this period. We can combine the previous model with energy reductions by simply taking the total energy reduction we expect in total and applying the (2050-2022) = 28th root of it. For example a 60% reduction means we're left with 40% of the energy so the energy reduction is 28√0.4 = 0.968, so each year we have 96.8% of the energy of the year before, a fall of 3.2% per year.

Energy reductions for people are like applying austerity. If we have to use 3.2% less each year, and we can't gain 3.2% more efficiency (certain), then that means we will have to ration energy usage. The combined amount of energy reduction for people will be the renewable investment + the energy reductions. If TickZero and Kristiann89 are correct and this model would be approximately correct, then that's 3.2+1.52 = 4.82% energy reductions per year, roughly a Covid-19 pandemic impact every year between now and 2050.

CO2

The primary limitation on energy and renewables is the carbon budget. The remaining carbon budget as of 2023 is taken to be 455000 MTonnes of CO2 (or maybe CO2e, which this model doesn't consider). to have a 50% chance of staying under 1.5ºC. For a 50% change of staying under 2.0ºC the carbon budget is taken to be 1375000 MTonnes of CO2. It's possible I'm quoting for the budgets that allow the temperature of overshoot providing that global temperatures return to 1.5ºC or 2.0ºC respectively, but this isn't crucial to the model, since the budgets can be adjusted.

We can calculate how much emissions we expect based on the the global energy usage and the amount of fossil fuels (TotalEnergy-Renewables-ZeroCarbonHeating) by knowing the CO2 produced by burning fossil fuels. This depends upon the kind of fossil fuels in general. We consider the primary components: Coal (at 0.85kg of CO2e per kWh[9]) and gas (at 0.49kg of CO2e per kWh[9]) and so the overall emissions are governed by the mix, which in this model is just a constant (by default 1:1 Coal:Gas [10]).

Simulations

It's possible to write a crude simulation involving these few variables: Total Energy, Energy Reductions over time, Renewables Investment and a mix of fossil fuels that lead to CO2 emissions. The simulation provides a default set of values and you can tweak them to see what happens under various conditions. Most of the information is shown with simple curves covering the years 2022 to 2050. When CO2 emissions exceed the 1.5ºC budget the background is banded in light yellow which increases linearly to pink as emissions reach 2.0ºC. It's not an accurate scale, mid-way between yellow and pink doesn't necessarily mean 1.75ºC is likely to have been breached. Instead it's an indication of severity of emissions.

Results

The default simulation hits +1.5ºC sometime in the late 2020s and gets to +1.8ºC by 2050. This is roughly similar to actual climate models in the sense that it involves major global investments and when it hits +1.5ºC. It involves a decline of 3.2% of energy usage per year.

It's possible to alter the parameters so that the overall energy loss to humanity is reduced - and correspondingly the renewables investment must be higher. For example if we don't reduce energy usage over time; and want to hit the same maximum temperature of +1.8ºC, then we need to invest 3.55% of global energy every year, and we hit zero carbon by 2043.

It's possible to explore trade-offs that result in zero-carbon before 2050 (and for developed countries there's a strong argument to say it should), but scenarios that avoid 1.5ºC altogether require investments + losses that exceed 10% per year. Again, this concurs with IPCC and other climate science models which emphasise the difficulty of achieving this: i.e. the virtual impossibility given the current lack of political will. As Kevin Anderson has said:

“There are no non-radical futures.” https://twitter.com/70sBachchan/status/1415023625183404036?s=20

Conclusions

I came into this model accepting the premise that we need steep declines in energy usage in order to reach zero-carbon. The model that agrees with TickZero's energy decline involves a 1.52% global energy investment per year, but in effect this has a 4.7% impact on energy per year at a personal level, something close to the crash of 2008 or the Covid pandemic.

I am not sure that society could deal with that kind of stress year on year for the next 27 years. Even then, the temperature rise is +1.8ºC, significantly higher than Paris and we hit it this decade.

The model also shows that for a constant energy usage, remaining at today's energy usage, and limiting the temperature rise to +1.8ºC, we would need a 3.55% global energy investment per year, which is a 3.55% hit for the first year followed by a 0% impact on energy per year at a personal level and we get to zero carbon about 7 years earlier.

It's certainly possible for society to take that kind of hit for a single year. To my mind, this is an easier and better course of action.

Why does it work that way? The simple answer is that a decline in energy usage leaves fewer resources available to invest in renewable energy. The argument for energy decline is that it will be impossible to ramp up renewable energy quickly enough, but ironically this model implies that it will actually make decarbonisation harder to achieve. In other words, reductionism is a far less feasible solution.

You are free to take this model and improve it, since it is undoubtably crude. The source code can be read easily by simply viewing the html for the page. Please bear in mind that the objective is to provide a simple model that can be readily understood. Essentially this model achieves that by treating the carbon budget as a proxy for complex climate equations.

Refs

[1] and
[4] https://www.weforum.org/agenda/2023/03/electricity-generation-renewables-power-iea/ Search for "29% to 35%"  Nuclear growth 3.6%/ year.

Possible Corrections

https://www.carbonbrief.org/guest-post-what-the-tiny-remaining-1-5c-carbon-budget-means-for-climate-policy/ says that the Carbon budget for 1.5ºC in 2020 was about 500GTCO2 and that we generated 70-80GtCO2 in 2020-2021 => 37.5GTCO2 per year average, with 40GTCO2 in 2022. So, that's about twice my estimate, because I have 71GTCO2 for 2022. This leaves a remaining budget of 380GtCO2 from the start of 2023, about 70GT lower than mine. Or it could be as low as 260GT.


Further Reading


Decarbonisation Sim

Renewables Investment %:
Renewables Improvement%:
Energy Decline%:
Coal/GasRatio%:

Your browser does not support the canvas element.

Sunday, 5 March 2023

MiniMorseMac

Introduction

After porting Mini Morse from the ZX81 to the ZX80, it occurred to me that Mini Morse would be a good candidate for converting to a classic Macintosh. I used my original introduction to classic Macintosh programming: Inside The Toolbox with Think Pascal.

I have that book, but used it to develop programs using Think C 5.0.4, because I had a proper copy of that; it works in a similar way and I'm more comfortable with C instead of Pascal. It turned out that it was fairly straightforward and satisfying to code, with the final application coming in at 3020 bytes.

Digital Archeology

Unfortunately, although Think C is readily available, I'm not sure of its legal status with regard to copying, even though it's abandonware. However, I am aware that Think Pascal, certainly up to version 4.5.4 at the end of its development is available for downloads for personal use.

I had had a version of Think Pascal 4.5.4 downloaded well over a decade ago, and had used it for some minor projects. Again, unfortunately, it's not easy to download. The web page still exists, but the Symantec link it uses at the time is now broken.

So, initially I ported my Mini Morse program to my Think Pascal 4.5.4, which I copied indirectly from my PowerBook 1400c (via a SCSI Zip drive and USB Zip drive). Then I found that the application it created, was about 16kB long. It seemed very unlikely to me that a straightforward Toolbox program, converted from Think C 5 for a Mac 7 Toolbox geared for Pascal would be that much bigger. And this lead me to the conclusion that Think Pascal 4.5.4 is not such a great IDE for early era Mac application development.

Then began the quest to see if it was any better under an earlier version. It turns out that Think Pascal 4.0.2 is available from a number of sources including Macintosh Garden, but the source I would trust the most is the link from MacGui.com. This downloads a Stuffit .sit file. You'll also need to download ResEdit, which you can from the same site here as a disk image.

Now, Stuffit still exists as a format for compressing Mac and Windows files, but the .sit file in question can't be expanded by the version of Stuffit Lite I had on my miniVMac emulator (as this Stuffit Lite was too early), and it couldn't be expanded by a later version of Stuffit Lite (because the compression format is no longer supported). After several approaches, I found that my iMac G3 running Mac OS 9 had a version of Stuffit that could expand that file, but I couldn't then use it to compress it so that it could work with Stuffit Lite on miniVMac.

In the end, I took a different approach. I used Disk Copy on the iMac G3 to create a .img disk image from the Think Pascal folder; which I could then open as a disk on miniVMac. From here I could create a new project in Think Pascal 4.0.2, which, when compiled as an application, took up only 2803 bytes.

This illustrates an increasing issue with the maintenance of retro software on modern platforms, via emulation or other means: the number of bridging technologies is becoming more convoluted as modern systems leave behind archaic technology. It's why I think I have to, or ought to maintain a number of Macs between my oldest (a 68000 Mac Plus from the 1986 era) to my MacBook Pro from 2018 via a Performa 400 (68030 Colour Mac) PowerBook 1400C (an early PowerPC Mac which runs System 7.5.3 and Mac OS 8.1 reasonable); iMac G3 (which runs Mac OS 9.2 and Mac OS X 10.3 OK); Mac Book Core Duo (which runs up to Mac OS X 10.6.8). Using these machines gives me a continuity of technology.

Running MiniMorse For 68K Mac

The purpose of this blog is to show how compact a 1kB ZX81 program can be on an early GUI computer. The ZX81 was a simple text-based 8-bit home computer which could officially support up to 16kB of RAM, but came with 1kB of RAM as default, along with its programming language, in an 8kB ROM.

The early Macintosh was a major conceptual leap in computing, supporting a sophisticated (for the time) Graphical User Interface with Windows, Icons, Menus and directly controllable gadgets. The earliest versions used a 32-bit, 68000 CPU and provided 128x the memory of a ZX81, with 8x the ROM. I never had the opportunity to use one of these machines directly, but at the University Of East Anglia, where I did my Computer Science BSc, they had the next model, with 512kB of RAM. These Macs could run simple development environments such as the interpreted Mac Pascal; or ETH Modula-2.

So, it's a natural question to ask how much more bloated equivalent applications were, on computers with that level of sophistication and about 8x to 32x the resources. And the answer, as far as Macs go, is that they are proportionally more sophisticated (a 3kB program / 400 bytes is about 7.5x larger).

What is really different is the length of the program itself. The ZX81 program is tokenised, so the source code for the version that takes up just under 400 bytes, is also 400 bytes, because the source is the final program. On the other hand, the Mac Pascal version takes up nearly 7kB of source code, around 17x larger, even though it compiles into a program only 7.5x larger.

The MiniMorse application can be found here. Download it onto your computer. You'll need a means of converting from .hqx to the application itself, but in https://system7.app that's easy. First you need to copy the file, by opening "The Outside World" server then dragging the MiniMorse app onto the Downloads folder. Drag the .hqx file to The Infinite Hard Disk. Then you open Infinite HD:Utilities:Compact Pro; Open Compact Pro and select Misc:Convert FROM Bin Hex. Navigate to the .hqx file in The Infinite Hard Disk and then save the Application in the same location. After a few seconds, the application appears in The Infinite Hard Disk.

Double-click the application to run it. You'll see a simple Mac Application:


As with the ZX81 version, typing a letter or digit generates the Morse code and typing a morse code generates the letter or digit. In addition to the ZX81 program, like a good Macintosh application MiniMorse sets the cursor to an arrow (as you can see), supports an about dialog:

And a Quit option with the command Q short-cut.

You'll find that MiniMorseMac handles window updates properly, can move to the back or front and can launch a desk accessory. It should work with Multifinder under System 6 or earlier or simply the Finder. You can shrink the memory allocation down to about 16kB and it will work fine.

Typing In The Program

MiniMorse Mac is short enough to type in. So, here's how to create the application from scratch. Firstly, create a folder called DevProjects and within it, create a folder called MiniMorse. This is where the Pascal project will go.

Next, run Think Pascal. It might complain that it needs 4MB to run, but it doesn't. Change the memory allocation to just 1MB and it'll be fine (From the Finder, choose File:Get Info on the application and change the box on the bottom right).

When you run Think Pascal, it will want to start with a project. Navigate to the MiniMorse folder and click on [New]. It will ask for a project name, type MiniMorse.π ('π' is option+p). Don't create an instant project, click on Done and the project window will be created. Save and then Quit.

The next step is to create the resources. Find ResEdit 2.1 and open the application. Create a new file and call it MiniMorse.π.rsrc. It's fairly tricky to describe how create resources interactively, but the following table should condense the information. You may find that the WIND, DITL and ALRT resources have fields for Width and Height instead of Right and Bottom, in which case the e.g. WIND menu will give you an option to switch the fields. Finally, [¹] means choose Resource:Create New Resource... (Command)K; [²] means choose Resource:Get Resource Info... (Command)I and in menus, [ENTER] means you literally need to press the [ENTER] key.:


Re-source¹ Fields.. [Close Window] Info².. [Close, Close]
WIND [OK] TOP=40, Bottom=240, Left=40, Right=280, Initially Visible, Close Box, Default Color ID=400, Name="MiniMorse", Purgeable (only)
MENU [OK] [X] Enabled, Title=• Apple Menu[ENTER], [X] Enabled, Title="About MiniMorse..."[ENTER] [ ]Enabled, • Separator line ID=128, No attributes.
MENU [OK] [X] Enabled, Title="File"[ENTER], [X] Enabled, Title="Quit", Cmd-Key:Q[ENTER] ID=129, No attributes.
DITL [OK] Drag [Static Text] to DITL and double-click it. [X] Enabled. Text="MiniMorse ©2023 Julian Skidmore[ENTER]Press a letter or digit to convert to Morse code, or press a sequence of '-' and '.' to convert a letter/digit", Top:4, Bottom:73, Left:64, Right:311. Close, Drag Button below Text. Double-click it. [X] Enabled. Text="OK" Top:90, Bottom:110, Left:159, Right:217. Close. ID=400, Only attribute=Purgeable.
ALRT [OK] Color:Default, DITL ID=400, Top:40, Bottom:240, Left:40, Right:280 ID=400, Only attribute=Purgeable.

When you've finished, close the .rsrc file. ResEdit will ask you to save it - save it. Then open up the MiniMorse.π project.  Choose File:New and create a stub of a pascal program:

program MiniMorse;
begin
end.

Choose File:Save to save it as MiniMorse.p. Choose Project:Add "MiniMorse.p" to add the file to the project. Next, add the resource file by choosing Run:Run Options... Tick the [ ] Use Resource File field and then choose the MiniMorse.π.rsrc file you created. Finally, Click [OK]

Now you want to replace the dummy program with the rest of file. When you've finished...

program MiniMorse;
  const
    kWindIdBase = 400;
    kMenuBarId = kWindIdBase;
    kMenuIdApple = 128;
    kMenuAbout = 1;
    kMenuIdFile = 129;
    kMenuQuit = 1;
    kAboutAlertId = 400;
    kWneTrapNum = $60;
    kUnimplTrapNum = $9f;
    { We want to support a 1s event timeout. }
    kSleep = $60;
    kOriginX = 10;
    kOriginY = 10;
    kMaxMorseLen = 5;
    kTapMax = 15;
    kMorseLetterCodes = 26;
    { 0..9=0..9, 10..16 :;<=>?@}
    {17, 18, 19, 20, 21, 22, 23, 24, 25, 26, 27, 28, 29, 30}
    {A B C D E F G H I J K L M N}
    gLettersToMorse = '6AE92D;@4N=B75?FK:83<H&gt>IMC';
    kMorseDigitCodes = 10;
    gDigitsToMorse = '_^\XP@ACGO';
    kMorseCodes = 64;
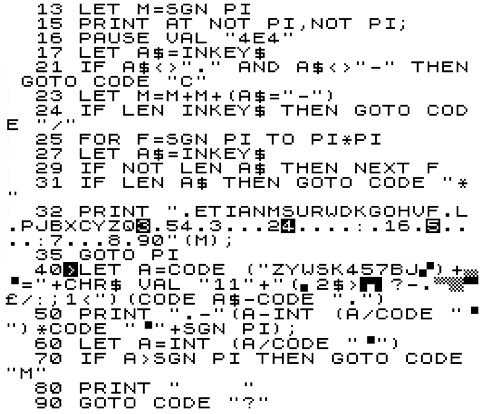
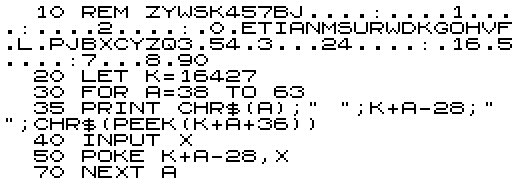
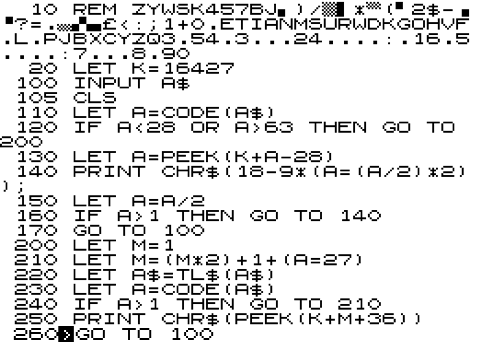
    gMorseToAlpha = '0.ETIANMSURWDKGOHVF.L.PJBXCYZQ3.54.3...24....:.16.5....:7...8.90';
    cMorseSyms = '.-';
  var
    gMorseWin: WindowPtr;
    gDone, gWNEImplemented: boolean;
    gTheEvent: EventRecord;
    gHelloStr, gNumStr: Str255;
    gMorseStr: string[6];
    gKeyCode, gMorseSyms: string[2];
    gUpdates, gMorseTap: integer;
    gTapTimeout: longint;
    { 0.5s timeout }

  function Later (aTimeout: LONGINT): LONGINT;
  begin
    Later := TickCount + aTimeout;
  end;

  function After (aTimeout: LONGINT): boolean;
    var
      tick: longint;
      timedOut: boolean;
  begin
    tick := TickCount;
    timedOut := aTimeout - tick < 0;
    After := timedOut;
  end;

  function DoMenuBarInit: boolean;
    var
      menu: MenuHandle;
  begin
    menu := nil;
    menu := GetMenu(128);
    AddResMenu(menu, 'DRVR');
    InsertMenu(menu, 0); { add after all.}
    menu := NewMenu(129, 'File');
    AppendMenu(menu, 'Quit/Q');
    InsertMenu(menu, 0);
    DrawMenuBar;
  end;

  function Init: boolean;
    var
      fontNum: integer;
      ok: boolean;
  begin
    gDone := false;
    gUpdates := 0;
    gKeyCode := ' ';
    gMorseStr := ' ';
    gMorseTap := 1;
    gMorseSyms := '.-';
    gTapTimeout := Later(kTapMax);
    gWNEImplemented := NGetTrapAddress(kWindIdBase, ToolTrap) <> NGetTrapAddress(kUnimplTrapNum, ToolTrap);
    gMorseWin := GetNewWindow(kWindIdBase, nil, WindowPtr(-1));
    ok := gMorseWin <> nil;
    if ok then
      begin
        SetWTitle(gMorseWin, 'MiniMorse');
        SetPort(gMorseWin);
        GetFNum('monaco', fontNum);
        TextFont(fontNum);
        TextSize(9); { just standard size.}
        ShowWindow(gMorseWin);
        ok := DoMenuBarInit;
        if ok then
          InitCursor;
      end;
    Init := ok;
  end;

  procedure DoMenuApple (aItem: integer);
    var
      accName: Str255;
      accNumber, itemNumber, dummy: integer;
      appleMenu: MenuHandle;
  begin
    case aItem of
      kMenuAbout:
        dummy := NoteAlert(kAboutAlertId, nil);
      otherwise
        begin
          appleMenu := GetMHandle(kMenuIdApple);
          GetItem(appleMenu, aItem, accName);
          accNumber := OpenDeskAcc(accName);
        end;
    end;
  end;

  procedure DoMenuFile (aItem: integer);
  begin
    case aItem of
      kMenuQuit:
        gDone := true;

    end;
  end;

  procedure DoMenuChoice (aMenuChoice: LONGINT);
    var
      menu, item: integer;
  begin
    if aMenuChoice <> 0 then
      begin
        menu := HiWord(aMenuChoice);
        item := LoWord(aMenuChoice);
        case menu of
          kMenuIdApple:
            DoMenuApple(item);

          kMenuIdFile:
            DoMenuFile(item);

        end;
        HiliteMenu(0);
      end;
  end;


  procedure DoMouseDown;
    var
      whichWindow: WindowPtr;
      thePart: integer;
      windSize, menuChoice: LONGINT;
      oldPort: GrafPtr;
  begin
    thePart := FindWindow(gTheEvent.where, whichWindow);
    case thePart of
      inMenuBar:
        begin
          menuChoice := MenuSelect(gTheEvent.where);
          DoMenuChoice(menuChoice);
        end;
      inSysWindow:
        SystemClick(gTheEvent, whichWindow);
      inDrag:
        DragWindow(whichWindow, gTheEvent.where, screenBits.bounds);
      inContent:
        if whichWindow <> FrontWindow then
          begin
            SelectWindow(whichWindow);
          end;

      inGrow:
        ; { don't support.}
      inGoAway:
        gDone := true;
      inZoomIn:
        ;
      inZoomOut:
        ; { don't support.}
    end;
  end;

  procedure Repaint (aWindow: WindowPtr);
    var
      oldPort: GrafPtr;
  begin
    GetPort(oldPort);
    SetPort(aWindow);
  { tempRgn=NewRgn;}
  { GetClip(tempRgn);}
    EraseRect(aWindow^.portRect);
    MoveTo(kOriginX, kOriginY);
  { DrawString('Updates=');}
  { NumToString(++gUpdates, gNumStr);}
  { DrawString(gNumStr);}
    DrawString('Key=');
    DrawString(gKeyCode);
  { MoveTo(kOriginX, kOriginY+10);}
    DrawString(' Morse=');
    DrawString(gMorseStr);
    SetPort(oldPort);
  end;

  procedure DoUpdate (aWindow: WindowPtr);
    var
      myRect, drawingClipRect: Rect;
      oldPort: GrafPtr;
      tempRgn: RgnHandle;
  begin
    BeginUpdate(aWindow);
    if aWindow = gMorseWin then
      begin
    { DrawMyStuff}
        Repaint(aWindow);
      end;
    EndUpdate(aWindow);
  end;

 { @ brief , handle Key Event , assume Later bottom byte .}
 {Keys aren 't sent to it now.}
  procedure DoKey;
    var
      ch: char;
      len, morseCode: integer;
  begin
    ch := char(BitAnd(gTheEvent.message, 255));
    if BitAnd(gTheEvent.modifiers, cmdKey) = cmdKey then
      begin
        DoMenuChoice(MenuKey(ch));
      end
    else
      begin
        morseCode := 1;
        len := 0;
        if (ch >= '0') and (ch <= '9') then
          begin
            morseCode := ord(gDigitsToMorse[ord(ch) - ord('0') + 1]) - 32;
          end
        else if (ch >= 'a') and (ch <> 'z') or (ch >= 'A') and (ch <= 'Z') then
          begin
            morseCode := ord(gLettersToMorse[BitAnd(ord(ch), $1f)]) - 48;
          end;
        if (ch = '.') or (ch = '-') then
          begin
            gMorseTap := (gMorseTap * 2);
            if ch = '-' then
              gMorseTap := gMorseTap + 1;
            gTapTimeout := Later(kTapMax);
          end
        else
          begin
            gMorseStr := ' ';
            while morseCode > 1 do
              begin
                len := len + 1;
                gMorseStr[len] := gMorseSyms[1 + BitAnd(morseCode, 1)];
                morseCode := morseCode div 2;
              end;
            Repaint(gMorseWin);
          end;
      end;
  end;

  procedure DoNull;
    var
      front: WindowPtr;
  begin
    if (gMorseTap > 1) and After(gTapTimeout) then
      begin
        front := FrontWindow;
        if front = gMorseWin then
          begin
      { We have a valid Morse pattern!}
            gKeyCode[1] := gMorseToAlpha[BitAnd(gMorseTap, 63) + 1];
            Repaint(gMorseWin);
            gMorseTap := 1;
          end;
      end;
  end;

  procedure DoEvent;
    var
      gotOne: boolean;
  begin
    gotOne := false;
    if gWNEImplemented then
      begin
        gotOne := WaitNextEvent(everyEvent, gTheEvent, kTapMax, nil);
      end
    else
      begin
        SystemTask;
        gotOne := GetNextEvent(everyEvent, gTheEvent);
      end;
    if gotOne or not (gotOne) and (gTheEvent.what = nullEvent) then
      begin
        case gTheEvent.what of
          nullEvent: { Handle end; Morse tapping.}
            DoNull;
          mouseDown: { handle mousedown.}
            DoMouseDown;
          mouseUp:
            ; { handle mouse.}
          keyDown:
            DoKey;
          updateEvt:
            DoUpdate(WindowPtr(gTheEvent.message));
          activateEvt:
            ; { Handle DoActivate;}
          diskEvt:
            ; { don't handle.}
          keyUp:
            ; { do nothing.}
          autoKey:
            ;
        end;
      end;
  end;

begin
  if Init then
    begin
      while not (gDone) do
        begin
          DoEvent;
        end;
    end;
end.
Finally, to create the application, choose Project:Build Application... Type a name for the application (e.g. MiniMorse), click [OK] and it should complete. Look for the compiled application and open it!

Conclusion

It's really simple to write a version of MiniMorse for a ZX81, but a lot more involved trying to create a version of the application for an early GUI environment on a Mac. It would almost certainly be much more complex still to do the same thing for Windows 3.1 or GEM (Atari ST). Nevertheless, it's possible to create a small pascal program at just under 3kB, because the Classic Mac's operating system interface is straightforward and compact.

Sunday, 29 January 2023

Mini-Morse

 Mini-Morse is a type-in 1K ZX81 program, but it's also a little treatise on encoding and Morse tutorials. Firstly, the listing which you can type in using an on-line ZX81 Emulator. Type POKE 16389,68 <Newline> New <Newline> to reduce the ZX81's memory to a proper 1K and then continue with the listing.


The Tutor

Then you can type RUN <Newline> to start it. It's really simple to use, just type a letter or digit and it'll convert the character to a morse code made of dots and dashes. Alternatively, type a sequence of '.'s (to the right of the 'M') and '-'s (Shift+J), fairly quickly and it'll translate your Morse code. In that case it's best to select the sequence you want and remember it, then type it out rather than trying to read and copy it. You'll find you'll pick up the technique fairly quickly. It only shows one letter at a time.

This is always the kind of Morse Tutor I would have wanted to use, even though it doesn't care about the relative lengths of the dots and dashes. That's because I want a low-barrier to entry and I don't want it to be too guided, with me having to progress from Level 1 to whatever they've prescribed. Also, the basics of Morse code is simple, so a program that handles it should be simple.

Encoding

So, here's the interesting bit. What's the easiest way to encode Morse? Here's the basic international set from the Wikipedia Morse Code entry:

The Puzzle with Morse code is that it's obvious that it's a kind of binary encoding, but at the same time it can't quite be, because many of the patterns have equivalent binary values. For example E= '.' = 0 = I = '..' = S = '...' = H = '....' = 5 = '.....'. Every pattern <=5 symbols will have at least one other letter or number with an equivalent binary value.

When people type in Morse they solve the problem by generating a third symbol - a timing gap between one letter and the next. And in tables of Morse code the same thing is done, at least one extra symbol is added - usually an extended space at the end of the symbol.

This implies that Morse can be encoded the same way on a computer, by encoding it as a set of variable-length strings (which involves the use of a terminating symbol or a length character), or encoding it in base 3 (so that a third symbol can be represented).

However, we should feel uneasy about this as an ideal, because everything about Morse code itself, still looks like it's in binary. Shouldn't it be possible to encode it as such?

The Trick

The answer is yes! And here's the trick. The key thing to observe when trying to convert Morse into pure binary is that every symbol is equivalent to another with an indefinite number of 0s prepended. As in my examples above, both E and H would be 0 in an 8-bit encoding: 00000000 and 00000000. So, all we have to do to force them to be different is to prevent the most significant digit from being part of an indefinite number of 0s, by prepending a 1. This splits the indefinite preceding 0s from the morse encoding. Then E and H become: 00000010 and 00010000. Of course, when it comes to displaying the symbols we'd begin after the first 1 digit. Another way of looking at it is to observe that the length is encoded by the number of 0s preceding the first '1' or the number of digits following the first '1', but the true insight is to grasp that this works for a variable-length morse-type encoding up to any number of dots and dashes.

You can persuade yourself that this works by trying it out on a number of Morse symbols above. An implication of this technique is that it means we know we can encode Morse in 1+the maximum sequence length bits. Here we only use basic letters and numbers so we only need 6 bits at most.

In the program above, Morse code uses that trick to encode using a pair of strings. K$ converts digits and letters into dots and dashes while M$ converts dots and dashes into digits and letters. I could have used just one string and searched through it to find the other mapping, but this is faster.

One thing else to note. M$ encodes dots and dashes as you might expect (e.g. 'E' is at M$(2), because E is now '10'. However, K$ encodes characters into Morse in reverse bit order, because it's easier to test and strip the bottom bit from a value in ZX BASIC, which lacks bitwise operators. The same trick works regardless of the bit order: appending a '1' (or '-') at the end of all the patterns and then '.'s to a fixed length encodes unique patterns for all characters.

Conclusion

Learning Morse code is tedious. It was great for communications in the 19th century when the world had nothing better than the ability to create a momentary, electrical spark from making or breaking a contact on a single wire, but the symbols are all fairly random and hard to learn. This is not to understate the amazing tech breakthroughs they needed (e.g. amplifiers and water-proofing cables!).

I've wanted to write a simple Morse tutor for a while and a 1K ZX81 seems a natural platform for such a simple exercise. Plus, the Morse to character translation is a bit real-time and I really wanted to pass on the encoding trick. MiniMorse takes me full circle to a hack of mine in 2010 which created a morse-code type encoding for a POV display based on the layout of a phone keypad. Check out Hackaday's entry for PhorseCode or my Google Site web page for it. PhorseCode could be converted to a proper Morse Code system using a different translation table.


Postscript

It is, of course, possible to reduce the memory size of MiniMorse. Here's a version that's only a mere 405 bytes long, with just 32b of variables. I could reduce it a bit further by combining M and A as they're never used at the same time. Ironically, many of the space-saving techniques on the ZX81 make the program appear bigger. This is due to the fact that literal numbers incur a 6 byte overhead as the internal representation + prefix of CHR$ 114 gets inserted into the code. By employing tricks such as NOT PI for 0, SGN PI for 1, INT PI for 3; CODE "char" for any number in the range 2, 4 to 63 or 128 to 191; VAL "number" we can save bytes by preventing the internal representation from being used. Caching very frequently used values as variables can sometimes also save memory. Finally, the biggest difference was made by evaluating the K$ and M$ strings directly in the code, which saved over 128b because they're no longer duplicated in the variables region.


And there are yet more improvements. It's possible to replace a GOTO CODE [CHR$ 13] with GOTO PI; and string$<>"" with LEN string$; string$="" with NOT LEN string$; CODE [CHR$ 10] with PI*PI and finally we only need 4 spaces and no ';' on the print statement at the end. This takes it down to 393 bytes!


Mini-Morse ZX80

It's possible to write a variant of MiniMorse for the 1K ZX80. We need to do this in two parts. Strings can't be indexed on a ZX80; we can't type all the printable characters (can't type inverse characters); and some characters are remapped if you type them (e.g. PRINT CHR$(18), CODE("-") displays '-' then 220. You can find the character set near the end of the user manual at this URL.

So, instead we put the conversions in a REM statement and PEEK them. Programs start at 16424 and the first character of a REM statement is at 16427.  So, the first stage is to enter all the Morse codes we can't easily enter (i.e. the letters).


RUN the program and type the values on the second row:

A.B. C. D E F. G. H. I J. K. L. M.N O. P. Q. R. S T U. V. W  X. Y. Z

6 17 21 9 2 20 11 16 4 30 13 18 7 5 15 22 27 10 8 3 12 24 14 25 29 19


After it has run, check the REM statement matches the first line of the final program. When it does, delete lines 30 to 70 and complete the rest of the program as shown below:


MiniMorse for the ZX80 works slightly differently, because you have to press <Newline> after typing in the letter or Morse pattern you want to convert: the ZX80 doesn't support INKEY$. The easiest way to escape the program is by typing in 0 and then pressing <Space> immediately after pressing <Newline>.